
Since I couldn't find the cloth activity book I wanted for Jack and Luke's christening gift, I decided to make one. The book needed to be safe for twins under 6 months, interactive, interesting to see and touch, not to mention biblically/theologically correct. Up for the challenge on a summer week filled with stifling humidity, ninety's heat, and flooding rains!
Actually, the idea for the book was also born of several days of unpacking the last dozen or so boxes from our move. No matter that was over 18 months ago. One of the books I put my hands on was a gift from a friend in 1986 entitled At the Name of Jesus by Sarah Hornsby. It contains 365 names by which Jesus was--and still is--called. Along with a Bible reference for each entry, there are a few thoughts on which to meditate for each day of a year.
First, I used the book to make a list of the names of Jesus that would be most easy to illustrate in a concrete way for little ones who are not abstract thinkers. Neither am I, so much! On the list went 11 names. I also Googled "cloth book" and found some helpful videos about construction of this project. Then I got busy with Microsoft Publisher. Here's my process.
DESIGN PAGES
- Choose an 8.5" x 14" Publisher page template.
- Draw a 6" x 12.5" picture frame and copy this page for a total of 6 pages.
- Use Clip Art to source images: Shepherd, Lamb, Vine, Door, (Christmas) Mary's Son, Crown/King, Star, Lion, Love, Gift, Friend.
- Choose images that will be easy to trace, cut, and applique in fabric.
- Insert Clip Art image (two per page). Position and size images to fit (~5" high) .
- Choose simple, easy-to-read font for text.
- Print design pattern pages.
 |
| Clip Art images for Jack and Luke's book printed on 8.5" x 14" paper |
 |
| Front Cover and Back Page Font is easy to read, no matter how large or small. |
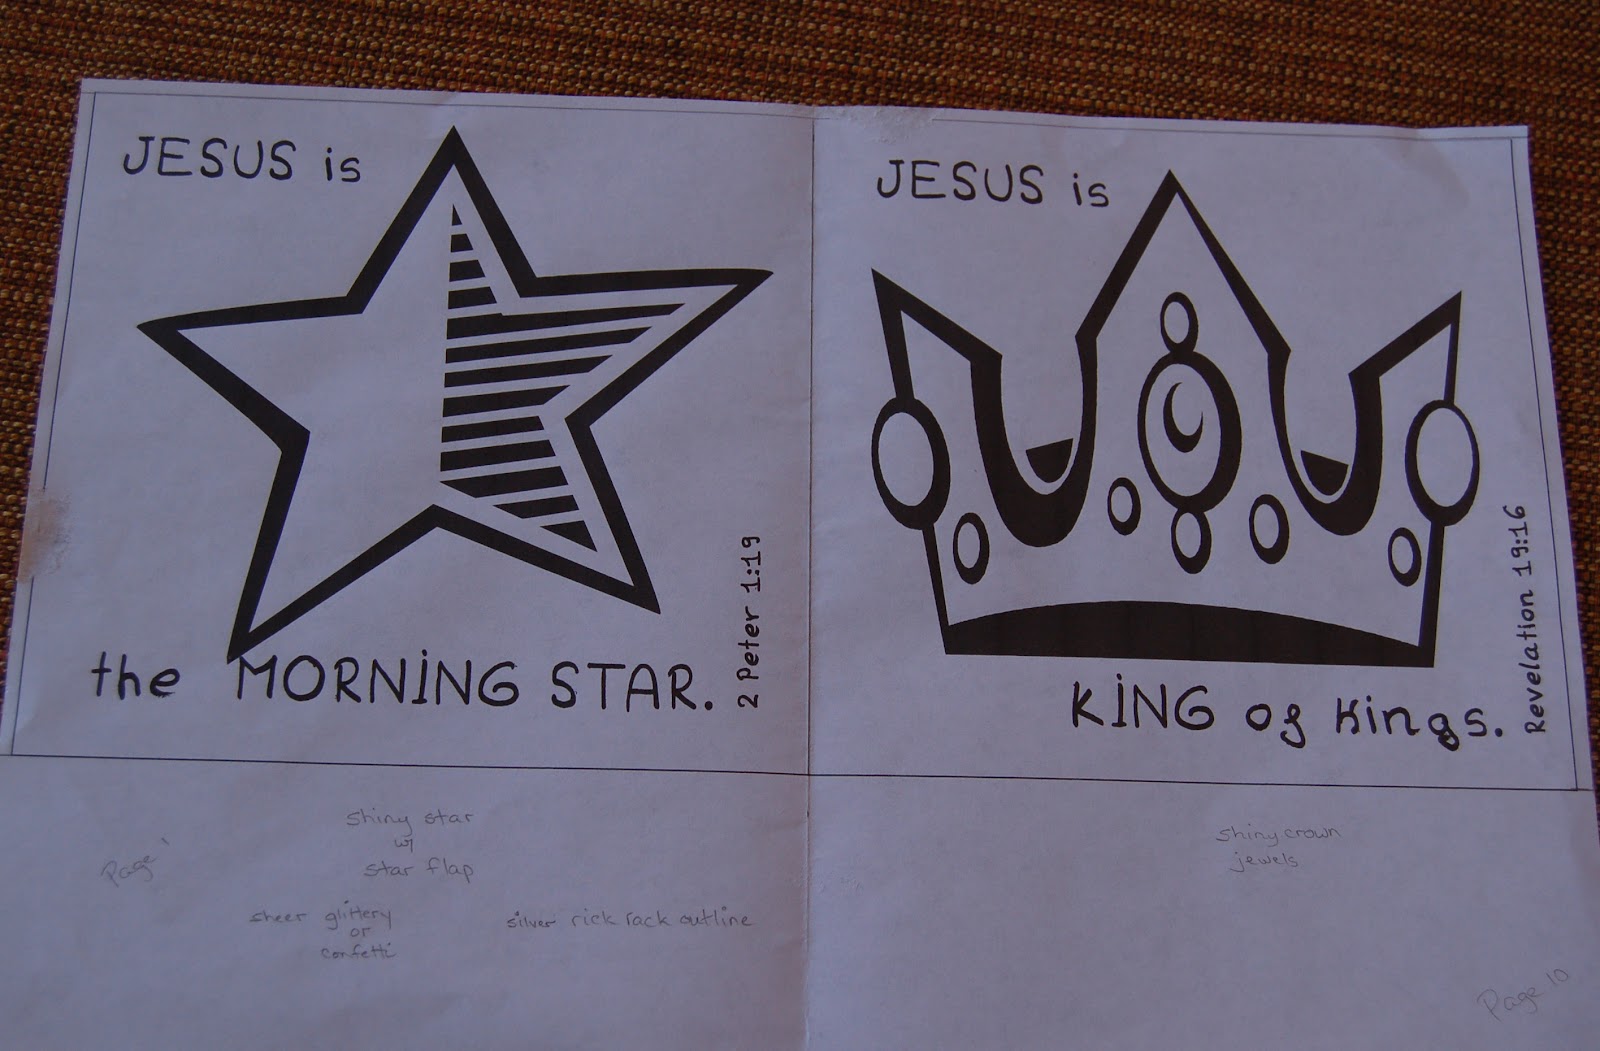 |
| Pages 1 and 10 Simple images are easy to trace, cut, and applique. |
 |
| Pages 9 and 2 Trace only Mary, Jesus, Manger, and Hay. Trace Lion Body and Head separately. |
 |
| Pages 7 and 4 Choose simple larger heart shapes only. The challenge? What to use for the vine? |
 |
| Pages 3 and 8 These two images will have flaps: door will open to reveal 'heaven' and gift box lid will lift. |
 |
| Pages 5 and 6 Shepherd is the most complex image to applique. Lamb is easy. |
GATHER SUPPLIES
- Make a list of fabrics/trims required for each image/page.
- Scour your scrap bag/fabric stash first. Then fill in with a trip to the craft or fabric store.
- Be sure you have a large spool of black thread on hand. It will save a trip to Hobby Lobby when you're in the middle of a line of zig-zag stitches . . . just sayin' .....
 |
| 1/2 yard of muslin + scraps of fabric and trims |
 |
| Fusible transfer web has a paper backing. Pellon's Wonder Under is one that works. Use pencil or permanent pen like Sharpie or Pigma. |
 |
| Use scraps from quilting/crafting/upholstery projects. Little fingers and eyes love texture, shine, color, and pattern. |
 |
| Scrap bag fabrics plus felt squares in grey, red, and camel. |
 |
| Love this left-over 'cork wood-grained' upholstery fabric! Perfect for a manger and a shepherd's staff. |
 |
| Buy the smallest cut--1/8 yard is only 4". Smooth, shiny satins and metallic knits, crinkly, sparkly sheer, rough bright burlap, soft fleece and flannel. |
 |
| Scour your ribbon bag and the $1 bin for trims: rick racks, ribbons, wired decorative trim, fringes. Get a 22" green polyester zipper and Velcro dots. Be sure you have plenty of black thread! |
- With pencil or permanent pen, trace part/image/shape (ie star, crown, lion body, lion head, manger, hay, Jesus, Mary, hearts, gift box, gift box lid, door, etc.) onto paper side of fusible transfer web.
- Leave margins between each traced shape.
- Label each part/image/shape.
- Cut each part/image/shape with margins surrounding--not on traced lines.
- Following product directions, fuse each shape to wrong side of designated fabric with iron.
- Use sharp scissor to trim shapes on the lines. Leave paper in place.
- Use permanent pen or stitching to 'draw' any features or lines on applique pieces. (Stitch right through paper backing--no problem.)
 |
| I laid the fusible web paper side up over the lion pattern. I traced the body (including legs and minus tail), and then separately--the head (minus mane). Once fused to the lion fabric, and trimmed to shape, I stitched the lines on the body. |
 |
| I stitched the lion's eyes and nose before fusing the head to its ribbon mane. I zig-zagged around the head to secure the ribbon mane before attaching the assembled lion to the muslin page. |
 |
| Manger, hay, and baby Jesus were stitched, decorated, assembled, and fused to Mary's robe before it was all fused and stitched to the muslin page. |
 |
| Rows of gold loopy fringe were sewn to fused crown shape before fusing and stitching shape to muslin page. |
- Cut 6 muslin rectangles, each 7" x 14."
- Carefully center muslin over pattern page. I taped the pattern to my work surface, and then taped the muslin to the surface in order to keep it from shifting.
- With Pigma or Sharpie permanent pen, trace all writing on each page.
- Do this before fusing/stitching appliques in place--just in case you mess up the printing. It's easier to cut a new piece of muslin than to rip off all that applique.
- Using pattern pages as needed, place appliques on muslin pages. Fuse. Stitch.
- There will be two appliques on each 7" x 14" muslin rectangle.
- Cut 6 squares low-loft batting, each 6" x 6."
- Layer one muslin page right side down, two batting squares, and another muslin page right side up. Pin edges. Zig-zag around edges--just catching batting. You now have one complete muslin page unit with two appliques facing up and two appliques facing down.
- Repeat #8 two more times for a total of three complete muslin units.
- Straight stitch down center of the Front Cover/Back Page unit. Set aside.
- Align and join the remaining two muslin units with a line of straight stitching down the center.
- Place the Front Cover/Back Page face down. Align and join the three muslin units with a line of straight stiching down the center.
- Cut two lengths of ribbon, each ~8" long. Attach one to outside front cover, and the other to outside back page. Close book and tie ribbon into bow.