In Brasil, after Daniel's arrival in February, I started looking at websites to see what inspiration I could copy. (The Gringa's not very creative, but I can run with someone else's idea and make it fit.) My friend Nara had a connection with the owners of a bistro, and was able to collect lots of green glass bottles of all shapes and sizes. At the same time, I stumbled upon a blog (Hostess with the Mostess or hwtm) that suited our resources, my skill level, and C's taste for the casual, simple, and pretty.
On the back balcony of the apartment, a variety of green glass bottles got soaked in a bucket of water with a little laundry detergent. After a few hours or overnight, the labels slipped right off with no pain or goo. That is, except for 2 or 3 that needed a little coaxing. I tried nail polish remover--acetone, and that didn't help. Believe it or not, my Neosporin Moisturizing Lip Balm dissolved the stubborn goo, and alcohol took the mess right off. HINT: This project took several days--remove labels, wash and dry bottles first. After the bottles are dry, do the ribbon.
 |
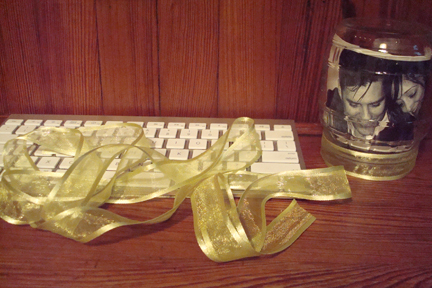
| My supplies for the bottle projects: ribbon, scissors, white glue (dries clear), acetone (which didn't work for label goo), and Neosporin Moisturizing Lip Balm (which did)! |
Next came the ribbon. Can you believe that Cecilia's favorite neighborhood ribbon and yarn shop carried the exact ribbon used on the Hostess With The Mostess blog's wine bottle vases?! The ribbon's acid green color was divine with the varied deep greens of the wine bottles. Calculating how much ribbon I needed took an extra step for the Gringa, since I don't do metric. But fortunately, there's Google for that too.
 |
| The Gringa's Helper--OnlineConversion.com |
 |
| The fita (ribbon) was an exact match to the Hostess With The Mostess blog's wine bottle vases. |
BOTTLE #1: Wine Bottle
The hwtm blog's 'how-to' listed 4 feet of 1" ribbon per bottle, but I used cheap string to measure before cutting the ribbon. Turns out, it's about 6 times the circumference of the bottle for the way I did it. (A bottle with a 12" circumference takes about 6 feet of ribbon.)
 |
| HINT: better to do a trial run with string, and save the $$ ribbon till you know how much you need. |
The blog's wine bottle vases had a definite front side and a definite back side; but I needed ours to look as close to the same on both the front and back, since people would be sitting all around the tables and viewing the bottles from all sides. So I made the twisted ribbon design on both the front and back sides, and tried to line up the twists vertically as much as possible. Each ribbon is tied with a neat knot and trimmed. Much easier to trim excess tails than to try to tie a good knot with just a tiny tail of ribbon.
 |
| My first three bottles look pretty from the front. |
 |
| Bottle on the left is the 'front.' Bottle on the right is the 'back.' |
No corks were needed for our wine bottle arrangements, so I skipped that step on the hwtm blog. We ordered very similar flowers to place in each bottle--one for each of 16 tables.
Bottle #2: Beer and Baby Wine/Champagne Bottle
We decided to do three bottles on each table. Bottle #1--the tall wine bottle vase, would hold some sprays of tiny white and yellow flowers like the hwtm blog. Bottle #2--each medium-height green bottle would hold one Gerber daisy. (Assorted bright colors for a fun punch would speak to the dotted napkins.) To dress up these bottles, I simply tied a ribbon around the neck of each with a single loop and trimmed the ribbon tails. That was enough to visually link the disparate bottles.
 |
| Bottle #2: Beer and Baby Champagne/Wine Bottles |
 |
| Tied with a 'half' bow. |
 |
| 16 each of the large and medium bottle vases, all ready for their flowers. |
Bottle # 3: Clear Glass Jar
On another Google hunt, I spied a fun idea for using shorter clear glass jars as recycled photo frames. BTW--We bought products that we may not have ever purchased, just to get jars with unique shapes for picture frames: asparagus spears, olives and olives and olives, strawberry jam with a cute little flare at the top and bottom. (HINT: Photos show better in jars with relatively straight sides.) All the asparagus, olives, and strawberry jam were dumped into plastic containers in the fridge. They didn't go to waste!
Cecilia and Will (the computer graphic designer, aka TechnoGeek) found 16 different pictures to celebrate their life together. I gave him a list of measurements since nearly every jar was a different shape and size. Most pix were in the 6" x 4" range, give or take a half or quarter inch. He cropped and Photoshopped the pix to a high contrast black and white that would show well in their recycled glass jar frames.
 |
| Black and White high contrast images for the glass jar photo frames were chosen and prepped by the Bride and Groom. The wooden box they're holding in the lower right photo is a pie box from Goode Company Barbecue. Shamelessly, it reads, "YOU MIGHT GIVE SOME SERIOUS THOUGHT TO THANKING YOUR LUCKY STARS YOU'RE IN TEXAS." |
The photos were gently rolled, inserted upside down in their 'frames,' and straightened up with a finger or pencil eraser. Then when the jar is placed upside down on its mouth, the picture shows in its proper orientation.
 |
| Upside-down jars of various sizes and shapes, each hold a different picture. |
In order to round out our bottlescape, I fixed a band of the same ribbon around the screw-neck of each jar.
 |
| Using a light touch and a little bead of white glue, I covered the screw-neck of each jar with ribbon. |
Cecilia hoped that the pictures would motivate people to move about from table to table and mingle.
 |
| All 16 of the recycled glass jar photo frames--ready. |
I think we accomplished Cecilia's vision of fun, simple, casual, pretty guest tables for the Churrasco. Tia Alice had some beautiful plans for the serving tables.
You'll see how it all came together pretty soon . . .!
No comments:
Post a Comment